Categories
Cars

New turbochargers – Day 12

Today I spent a few hours playing with my new parts.

Out with the old

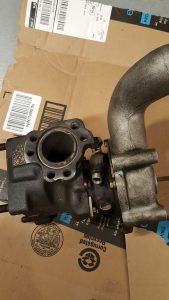
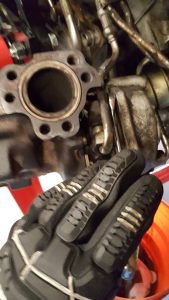
I took the driver’s side turbo off, separated it from the exhaust manifold and I bolted the new passenger side turbo up to the passenger exhaust manifold.

Clocked correctly?

One thing I am a bit curious about, the turbo has a divot that looks to be intended for exhaust manifold clearance. The turbo housing appears, however, to be a few degrees off and is making contact with the manifold. I will need to recheck this once it’s on the car to make sure the turbo is clocked correctly.

Time invested: 3 hours

Categories
Cars Idle

New parts

New parts arrived today from XSPower. Time to start putting some shiny new parts onto my old engine.


Categories
Cars

Engine refresh – day 10

Today was a short day, spent mainly taking stock of the next set of parts I would need. I spent about an hour picking through the parts and ordering replacements.

Categories
Cars

Engine refresh – day 9

Passenger side turbo is off… and took much longer than expected (which I should start to expect).

Don’t try this at home

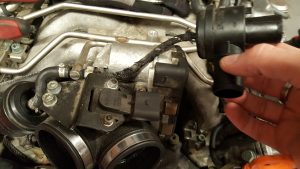
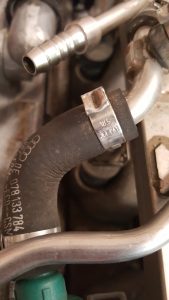
One more thing I surely would have found crazy frustrating if the engine wasn’t out of the car. In order to take the passenger turbo completely out there are a number of fluid lines which need to be disconnected. For some of the bolts it’s impossible to get normal-sized tools in to reach them (and I only have normal-sized tools). To get the turbo loose I cheated by loosening the housing and rotating it to gain better access. I wouldn’t recommend this, however, if you’re not planning on replacing or rebuilding your turbos as you could damage them.

Accessories going back on

I also started putting the accessories back on the front of the engine. I need a new idler wheel for the accessory belt, so am not completely done with that part of the refresh.

Time invested: 6 hours

Categories
Cars Idle

Engine refresh – Day 8

Valve covers went back on today.

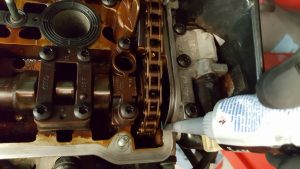
A little gasket maker into the corners.

All the seals are done, so it’s time for the valve covers to go back on. After double-checking the torque on all the bolts I applied gasket sealer to the recommended corners, put on fresh gaskets and then put the valve covers back on.

Timing belt waiting for crank bolt.

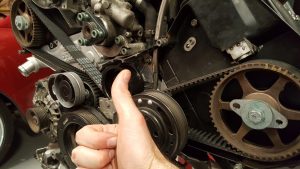
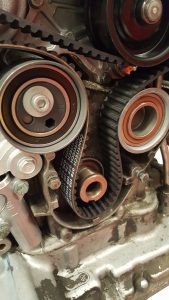
Moving from the top of the engine to the front I put on the new timing belt tensioner and idler roller. I’ll confess, getting the timing belt back on was much more of a chore than expected. There is not much space around the shroud, so the belt has to slide in perfectly straight or it binds up. There is no slack in a new belt so it was a struggle to get in. I’m not sure I would have been able to do this with the engine in the car.

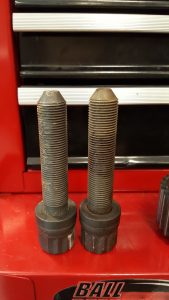
Stretchy (new bolt is on left)

Along with putting in the timing belt I replaced the crank bolt. I found it fascinating that the bolt actually stretches from the torque applied to it during it’s time in the engine.

If you are doing your own timing belt, I found the ECS guide was an excellent reference. Print it out and have it on hand to supplement whatever manual you are using.

To close out the day turned my attention to the passenger side turbo and loosened the exhaust manifold.

Time invested: 4 hours.


Categories
Cars Idle

Preparing for new brakes – Day 7

I took a day off working on the engine today and focused on brakes (sort of).

It could be argued that the brakes on the B6 A4 are undersized for normal duties. They will stop the car, no problem, but warping is common. For my upgrade I will be going with a set of Brembo 6 piston calipers which require more wheel clearance than the stock setup. To make room I’ll need to order some wheel spacers and I want to get the spacing correct. I used some cheap spacers to test fit the wheels and make sure they would stay inside the fenders.

At the same time I put in some temporary hub adapters to scale down the bore of the B8 wheels to match my B6 hub. It was totally worth the $20 I spent on the set, it cured the vibration I was getting on the highway (see Day 6).

Time invested, a couple hours of jacking the car up, putting it down and then jacking it up again to add spacers.

Categories
Cars

Engine refresh – day 6

Today I spent a couple hours at the shop, but not all of it was on the engine.

I started off by measuring the bore on my new wheels. I’ve been getting a little vibration on the highway and I suspect it might because I bought B8 generation wheels for my B6. The B8 has a larger hub size and so the wheels may not be precisely centered. I’ve ordered some spacers that I hope will cure that problem.

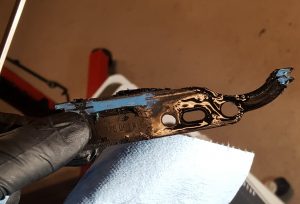
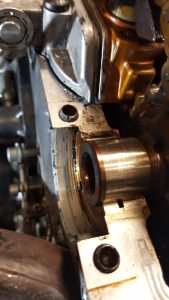
And now, on to the engine work. Today’s task was to replace the cam chain tensioner seal on the passenger side of the engine. This side of the engine was worlds easier. On the driver’s side I had to loosen the camshaft as well as compress the chain tensioner. On the passenger side compressing the chain tensioner was all that was needed. Turns out the passenger side was much worse off than the driver’s side. The shiny gunk you can see on the gasket is not sealer, it’s oil that was working it’s way through.

Cam tensioner seal with oil on it

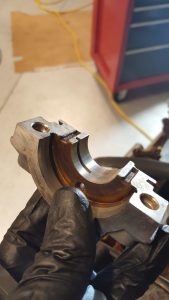
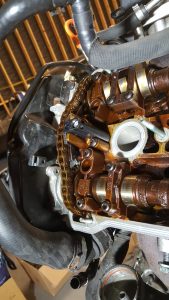
Since the seal on the passenger side was so much easier I had some more time in the evening’s budget, so I also replaced the cam shaft cap on the passenger side. Since the valve cover was off I decided to replace the cap by pulling the top bracket off (I’m sure it has a real name) and clean the area well. I’m pretty sure that was a good decision because I found one of the oil channels was completely blocked by some hardened crud. I cleaned that up and put it back together with a fresh cap.

Top cap for the camshaft, channels for the oil visible on either side of the arch.
Look closely at the far side of the camshaft, that’s a sold bit of hardened oil

Today was 2 hours, an hour on measuring the wheel and doing research and another hour on the passenger side of the motor.

Categories
Cars

Engine refresh – day 5

Still have my hands under the valve covers today, this time at the front edge of the driver’s side replacing the timing chain gasket. The timing chain cover made this a real pain to get to (that and I couldn’t get enough slack in the timing chain).

What should have be at most a 30 minute task took 90 minutes and a couple sets of hands.

Once we were able to get the gasket clear of the guide pins I pulled the half-moon seal, scraped the surfaces and put in a new seal and gasket.

Categories
Cars

Engine refresh – day 4

Day 4 was the flip side of day 2: I took off the driver’s side valve cover, removed the seals and prepared it for new gaskets.

EngineDay4-1

Not terribly exciting, but another hour of work down.

Categories
Cars

Engine refresh – day 3

Today was all about the front crankshaft seal. It wasn’t leaking, but it was accessible with the engine out, so why not? Well… one could argue: don’t fix it if it ain’t broke, that’s why not.

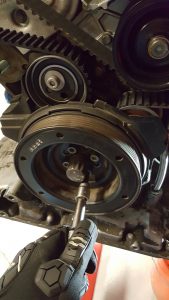
First step was to get the crankshaft harmonic balancer bolt out. This bolt is torqued to 150 lb/ft… and then turned another 180 degrees. It’s in there tight… so tight that the force actually stretches the bolt. Getting the bolt out took me about ten minutes of straining, spraying penetrating oil and an air impact gun.

EngineDay3-1

Since it wasn’t leaking it was a bit of a pain to pull out. By the time I realized I should have left well enough alone, I had already beat up the front of the seal, so it had to come out. With John’s help the seal finally came loose. Putting the new seal in was simply a matter of finding the right tool to seat the seal (which, when you don’t have a seal tool, the right tool is a 36mm Craftsman socket).

EngineDay3-2