Categories
Idle

Quick tip: slide to open cheap resealable bags

You know those tiny little bags of screws and bits you get with Ikea furniture and computer components? Don’t struggle to pull them apart, just squeeze and slide!

opening zipper seal bag

The cheap re-sealable “Ziploc” bags that come already filled are often made out of very thin plastic and the seal can be stronger than the material to which it’s attached. I’ve found that the easiest way to open these little bags is to slide the two tracks against each other and the bag will pop open at the corners. In most cases you can even open the baggies one handed, keeping the other hand free to pat yourself on the back (something I find necessary since my wife is rarely as impressed with me as I am with myself).

Categories
Tech

Launch your web browser as another user

In SharePoint 2013 there is no longer a quickie menu choice to allow you to indulge your alter ego. I’ll let others go into depth on why it went a way, but I wanted to share a quick tip for how to be another user when you need to test your SharePoint install: create a desktop shortcut to launch your browser with the runas CL argument.

image

New identity, no waiting

When you created your new SharePoint installation you probably gave yourself Epic Guru level access (it may be called Farm Admin in your version). This is good, it allows you to get tons done. It doesn’t, however, allow you to verify you’ve adequately secured the CEO’s Beanie Baby picture collection, or pretend to be an adoring fan posting to your My Site news feed. To do that, you need to be someone else.

For my example I’m going to use Internet Explorer, because I’m an unapologetic company man. You should feel free to swap in your browser of choice… like Netscape or Lynx.

  1. Create a shortcut to your favorite browser. In Windows I did this by navigating to C:\Program Files (x86)\Internet Explorer and dragging iexplore.exe to the desktop (by default this creates a shortcut).
  2. Right click your new shortcut and select “Properties”
  3. Modify the shortcut target by adding runas and the desired user account to the beginning of the path. Change the target to (replace user@domain with your test acct):
          %systemroot%\System32\runas.exe /user:user@domain "%ProgramFiles(x86)%\Internet Explorer\iexplore.exe"
  4. Click OK to save changes.

image

(Note: if you’re not running 64bit windows, the target should be: %systemroot%\System32\runas.exe /user:user@domain "%ProgramFiles%\Internet Explorer\iexplore.exe")

Double-click your new shortcut and you’ll get a prompt to enter a password. You won’t see anything on the screen as you type, so just go on faith. Type your pw and hit enter.

A little extra for style points

Because I can never leave well enough alone, I had the need to soup up my shortcut (I’m way to old to say “pimp my shortcut”… but you know I was thinking it). The icon of the runas.exe shortcut is boring. I need an icon that screams “I’m a browser shortcut!”

Once again, right-click the shortcut and select properties. Click the change icon button. I went for the globe with a mouse on top.

image Just because I want to customize it, don’t assume I have any imagination.

Finally, give yourself a reminder that you’re someone else. Double-click your shortcut to launch the browser. When your browser comes up, enable the favorites bar (in IE, right-click the title bar and choose favorites bar). Bookmark a site (any site will do) and add it to the favorites bar. Right click your new favorite and rename it to the user name of the special account.

image  Must remember to put on the glasses…

Instant split-personality. Let me know how it works out for you!

Categories
Tech

Showing more detail in SharePoint Calendar

image

The SharePoint calendar is an ideal place to give people a quick overview of team events, but the overview can be a bit thin on detail for some people’s tastes. The calendar structure is pretty rigid, so we can’t just add columns to the view like we do in other SharePoint lists. We can, however, pick which column to display in the calendar view. Using calculated fields we will build a new event title to have our calendar events communicate extra information at a glance.

Here’s what we want: when looking at the calendar we’d like our site members to see the title of the calendar event AND the location of the event in parenthesis. The pictures below show what SharePoint gives us out of the box compared to what we’d like for our site members:

SharePoint gives us: image We Want: image

Here’s what we’ll do in brief:

  1. Create two calculated fields, one to be the month view title and one to be the sub heading for day and week views.
  2. Modify the view to show our new columns instead of the default columns.

Create new calculated field columns

imageIn our SharePoint calendar we’ll navigate over to the Calendar tab and click the "Create Column" ribbon button. We’ll call this column "Month View Title" and set the type to "Calculated". Now, let’s build up the formula. Remember, we want the end result to look like this:

Event Title (Location)

To create that string, our formula will look like this:

[Title] & " (" & [Location] & ")"

SharePoint’s calculated field will (among other things) combine, or "concatenate", strings. To concatenate strings we use the "&" (ampersand) symbol much the same way we use the "+" (plus) symbol for adding numbers. Building a string is as easy as double-click a column, type an ampersand, type some text in double quotes ("). We use the double quotes to make sure SharePoint knows we’re concatenating a string and not just another field.

For consistency with the month view, we also would like the location wrapped in parentheses for the day and week views. Let’s create another calculated column for this. Repeat the steps to create a column and call it “Day Week View Sub Heading”. The formula will look like this:

"(" & [Location] & ")"

Modify the calendar view

Now that we have the strings we want, we can change the calendar view to show our new calculated columns instead of the default, "out of the box" (OOB) event title.

imageIn your calendar, head back over to the Calendar tab again and this time click the "Modify View" button. In the Edit Calendar View settings we’ll change the "Calendar Columns" to show our new calculated fields. The title fields we’ll change are the "Month View Title", the "Week View Sub Heading" and the "Day View Sub Heading". Since we’re extra clever, we gave our calculated columns names which match up very nicely with these field titles. Click the OK button to save changes and we’re done.

Go crazy

The SharePoint calculated column feature gives a lot of flexibility and can be used without having to open SharePoint Designer or learn to write custom SharePoint solutions. Check out this article on MSDN to get your creative juices flowing.


Update: We’ve cross-posted this on the SharePoint for End Users blog.

Categories
Life

A couple box packing tips

When a release is finished at Microsoft people pull their heads out of their current product and frequently move around between teams (and that means packing up your office to head to a new location). Watching professional movers pack my house for the move to and from Ireland did teach me a little about moving. There are two biggie tips, however, that stood out.

Tape your boxes the wrong way first

Going from flat cardboard to a box can be awkward with one person. It’s not tremendously hard to assemble a box, but if you want it to be nice and square you can speed the process by running the first piece of tape perpendicular to the seam.

IMAG0068 (2)

Align the bottom flaps and run a piece of tape across the bottom of the box and it will be held closed and aligned while you tape the seam.

Pack your boxes on top of other boxes

The first tip will save you a little time, but this second tip will save your back. No matter how careful you are, moving is tiring and often hard on your back.

IMAG0069 (2)

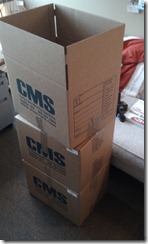
Once you have a box or two packed, put your next empty box on top of your packed boxes. Loading this top box will be much easier as you won’t be bending down to put items in the bottom of the box. You should, of course, protect your back from the beginning and start your first box on a chair.

Combo bonus!

I recommend combining the two tips and build your new boxes on top of the other boxes (see first picture). Constructing your fresh box on a raised pedestal will preserving your back even when you’re straining to lift your collection of dolls action figures.

Watch what you eat

Not really a packing tip per se, but the logo on the bottom of the packing boxes did make me worry that if I’m not careful I might die of dysentery.

IMAG0070 (2)

Categories
Photoshop Tech

Quick image straightening with Photoshop

Microsoft Digital Image Suite, for all its limitations, does a few things really well:

  • Fix red-eye
  • Stitch together panoramas
  • Make straightening images brain-dead easy

I love Photoshop.  It’s definitely my image editor of choice but I always used to launch Digital Image to straighten pictures, then I’d go back to Photoshop for the rest of my tweaks.  It wasn’t until I bought The Photoshop Book for Digital Photographers by Scott Kelby (also in flavors for CS2 and CS3) that I learned the Photoshop method.

Straightening images is actually a pretty simple process, but nowhere in the Photoshop UI does it say “straighten”.  I suppose I could have read the manual, but where’s the fun in that?

The basic steps are:

  1. Use the measure tool to figure out the angle to rotate
  2. Perform an “arbitrary” rotation
  3. Crop your picture

Let’s say you’re in a hurry (or drunk) and snap a quick photo at a wonky angle.

The first step (after opening the picture with Photoshop, of course) is to select the measure tool from your tools palate.  The measure tool is the ruler buried under the eyedropper tool and can be accessed by clicking and holding or by hitting shift-i repeatedly until the measure tool is selected (I’m a big fan of keyboard shortcuts in Photoshop, they save me a bunch of time and make me feel like a power user).

Once you have your measure tool selected you need to pick a line in the picture you think should be horizontal or vertical.  If you’re straightening a landscape the horizon is a good bet.  If you are shooting buildings using a wide angle lens you’ll want to pick a line near the center of the picture and probably a vertical one.

Use the measure tool to draw along the line you think should be vertical.

Rotating the picture is now a fairly automatic process.  From the Image menu select Rotate Canvas -> Arbitrary.  When the dialog pops up you’ll note Photoshop has already filled in a number.  The software has looked at the line you drew using the measure tool and input the number of degrees to rotate automatically.  All you have to do is press OK.

Your image is now straight but you have some extra gunk you need to trim off.  Grab the crop tool from your palate (or hit “c” on your keyboard) and pick out the part of the picture you want to keep.  Hitting enter on your keyboard will crop the picture and after you save you’re done.


Categories
Tips

Enabled Clear QAM on my Media Center, High Def goodness ensues

If you record cable TV using Windows Media Center you may have wondered about recording high definition signals off the cable (or, like me, struggled unsuccessfully to make it happen). If you’re willing to take the beta plunge, Windows 7 has made getting some high-def content off your cable a lot easier.

First, the hurdles: you’ll want to do this only if you’re willing to run beta software and are not afraid of using RegEdit. To get it done without running a beta operating system you can track down the TV Pack for Vista Media Center (code named fiji), some other software and do some registry changes. If you believe the forums, upgrading Vista is more work (clean install plus two additional software installs), however, than running Windows 7. Windows 7 is just the singular install… but keep in mind you’ll need to be ready to buy it when the full version comes out.

The whole process was completely painless for me. I needed more hard drive space so I just took the old drive out to be an easy backup. I put in a new, bigger hard drive, installed Windows 7 Beta then headed over to Mike Wren’s blog for the registry setting for my card (Hauppauge HVR 1600). A quick reboot later and Media Center could see the clear QAM channels! Sweet! No more weather interference when watching local high definition broadcasts. 

Keep in mind, this doesn’t mean you can get all the high definition channels. Even if you subscribe to HBO (for example) the signal will be encrypted. Clear QAM is the unencrypted digital content broadcast over cable. For Comcast in my area this is our local stations in high definition as well as standard definition duplicate versions of some other channels (like Speed). It’s worth noting, just because it’s digital, it doesn’t mean it’s high definition. If you want to get all the content off your cable you’ll need to pay the big bucks for a CableCARD approved Vista PC. If, however, you’re like us and you really only care about HD from the major networks this does it.

Categories
Tips

Getting a list of files for a directory

Ever had a folder full of files and needed a text listing of all those files? Here’s a quick n’ dirty way to do it.

image I have a whole folder full of new icons for the next version of SharePoint and need to check them into source control. The big pain here is that I’ll need to go into source control and type in each file name to unlock it for editing, copy in the new file, then type in each file name to check it in. If, however, I had a list of all the files I could make a quick batch file to do it for me.

  1. Open your command prompt (on Vista, type cmd then right-click and run as administrator)
  2. Change directories to where you need a listing
  3. On the command line type: dir /b > filename.txt

Windows will create a new text file named “filename.txt” (you can name it anything you like on the command line). One thing to note: your text file will be included in the list, you may want to remove that line before using it to do any bulk operations. Enjoy!


Edit: A good reference for directory listings: http://www.computerhope.com/dirhlp.htm

Categories
Tech

Turning on AutoComplete to make IE’s history useful

For ages I’ve been annoyed by the IE history drop down which appears when you start typing an address. Here’s the thing, most of the work we do is stored on our SharePoint server at work. This means that if I start to type the URL of the server I’ll get a massive autocomplete list pop down in IE. This makes the recent history that drops down completely useless for me.

Now, however, thanks to Sean (via Omar) I have been shown the light. I followed the simple steps and my life is now better.

Quote

My Favorite (hidden) IE feature

Whenever I install Windows on a new PC (which in my daily work happens far more frequently than I care to admit), there’s one* setting that I always tweak before doing anything else:

Internet Options, Advanced tab, "Use inline AutoComplete"

What this does is enables autocomplete of URLs (and other commands) in the address bar, instead of just as a drop-down.

Here is an example. Let’s say I visit both the IEblog (http://blogs.msdn.com/ie) and the RSS team blog (http://blogs.msdn.com/rssteam) regularly.

The next time I go to the address bar, I type "blo". IE shows me this:

Then I hit the right arrow (essentially to accept the text it’s given me), and I type "r":

Press enter, and I’m at my favorite blog!

Bonus feature: this works in every address bar: explorer, the run dialog, and system-supplied open/save dialogs, and any app that uses the system edit control (and enables URL autocomplete).
Double bonus: this works in IE6 as well (but upgrade to IE7 now!).

Downside, you probably should be a touch typist before turning this on. If you’re not paying attention to the screen while you type, you may inadvertently navigate to something you didn’t want to. Windows developer guru and part-time Windows historian has blogged about this, so I don’t have to (note: you should read the comments to see the correction to how he describes the feature — it doesn’t change the basic point, however).

* Truth in advertising: there were two settings I always changed. The second was to turn off "reuse windows for launching shortcuts" — a highly annoying feature of IE6 that picked one of my open windows and changed the page being viewed whenever I clicked on a link in Outlook or elsewhere. It was designed to help users keep the number of windows being opened under control. But IE7’s tabs make that unnecessary, because now the default is to open a new tab in the same window. Both problems solved!